![]()
By
Cree Vicar Dave ~ SASS Life #49907
Have you ever been camping in your RV in the summer without air conditioning? Or maybe you have experienced an untrustworthy AC unit that only pumped out warm air at a Cowboy Action shoot campgrounds when you fired it up on a hot day? It says in Proverbs 25:13, “Like the coolness of snow at harvest time is a trustworthy messenger to those who send him; he refreshes the spirit of his masters.” Air conditioners are a real refresher in today’s world.
I remember when the Vicar’s Wife and I were working as missionaries to the American Indians in Arizona. In the heat of a summer day you could touch off a cannon down most sidewalks and not hit hide nor hair. About the only people who were brave enough to venture out did so in an air conditioned auto. Today it is hard to find an RV without AC. Most of the rigs I see at Cowboy shoots are equipped with one or more cooling units.
When we were about to set out on our quest last fall to attend various state shoots we found out that the AC on our newly remodeled 29’ forty year old Airstream did not function as designed. I got in contact with Mt Forest Ron who works on cars and air conditioners to have a look see. The worst possible news was brought forth. The original AC unit in our 1969 Airstream was post terminal. Well there wasn’t enough time on the calendar or enough money left in the ole sock to remedy the problem before we set out so we decided that could wait until this summer.
We had our sights set on a Carrier Low Profile model. Carrier has been in business for quite a while and I like the thought of not snagging something over head. Well by the time we decided to buy one we found out that Carrier had quit making RV air conditioners. Apparently they were not selling enough of them to justify making them. Possibly because of the downturn in the economy. Anyway we prayed about it. I called Carrier’s home office and asked if they knew of a distributor that still might have one. I’m not one who gives up easily. Calling worked for me while looking for a particular Ruger revolver I was having trouble finding. The gal at Ruger found that there was still one in a warehouse in Alaska. The woman at Carrier got me in contact with a distributor in Michigan and they gave me the number of an RV dealer nearby who just happened to have one AC left that was the correct size for our trailer. But the ceiling unit was a ducted one and we needed open air. Then they made a call and found one inside unit that would work for us. We picked the AC up and headed home with big grins on our face.
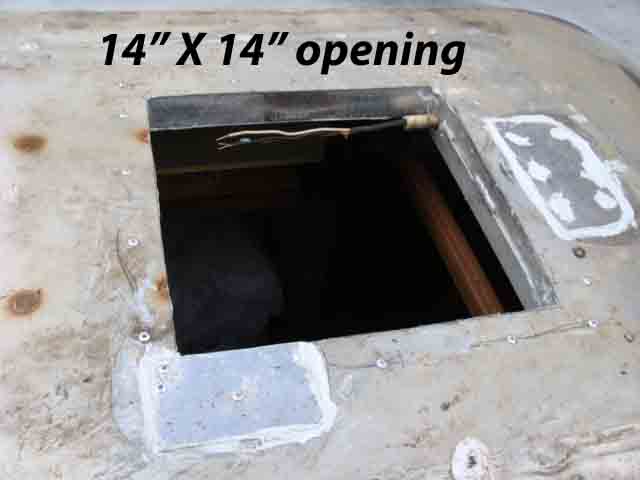
Now if you have never installed an RV AC you might want to ask a few questions of people in the know. I had put one on our 1966 but there was a vent opening in the middle of the trailer to use for an opening. You see the older Airstreams AC have the compressor unit on the top of the trailer then two copper lines pass through a 2” hole to the cooling unit inside the trailer. The new AC requires a 14” by 14” opening in the roof with something between the inner and outer skins to keep them from squeezing together when the AC is tightened down. I called a friend at an RV place that works on Airstreams. He said that he had put the same unit in his Airstream trailer a while back and gave me some pointers.
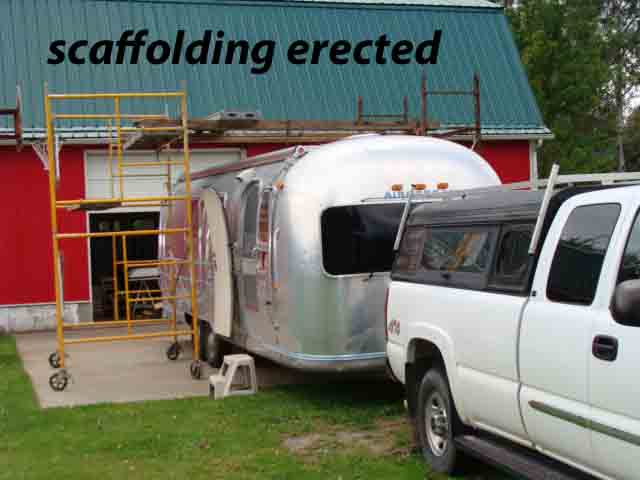
The first thing that our son, Gold Tooth Dave, and I did was to put up scaffolding on both sides of the trailer and clamped boards and or picks across them to work off. Airstreams are not compatible with boots made for walking on the roof. They do have aluminum ribs between the outer and inner aluminum skins. But the ribs are a ways apart. Then came the fun part, removing the old AC unit. The gas was already gone so we started taking screws and pop rivets out. I took the screws off the inside, and that went fairly well, but roof unit was a different matter. There were some hidden screws under the motor and junction box. It took a good part of one day to remove it and seal up the holes in case it rained.
Next we went inside to measure to see where things would end up. I knew that the span between the outer and inner skin was a little less than 2”. There was a rib about where the front of the 14” by 14” opening would be going so we started around 2” back of the rib and marked out our lines. The inside aluminum skin cut easily with tin snips. We didn’t cut open the roof until we were ready to plant the new AC unit. The actual measurement between the skins was 1 3/4" so we ordered a length of 1 3/4” by 1 3/4" square aluminum tubing with a 1/8” wall. We got the tubing the next morning.
The front and the back pieces of square tubing had to be bent to match the curve of the roof. I made a template and a little heat was applied to make the proper radius. When heating aluminum one should be careful not to overheat as melting can occur. A good way to get the temperature desired is to light the oxy acetylene torch and with just the acetylene burning cover the area to be heated with soot. Open oxygen to proper flame and heat uniformly. When the soot is gone it should be ready to blend.
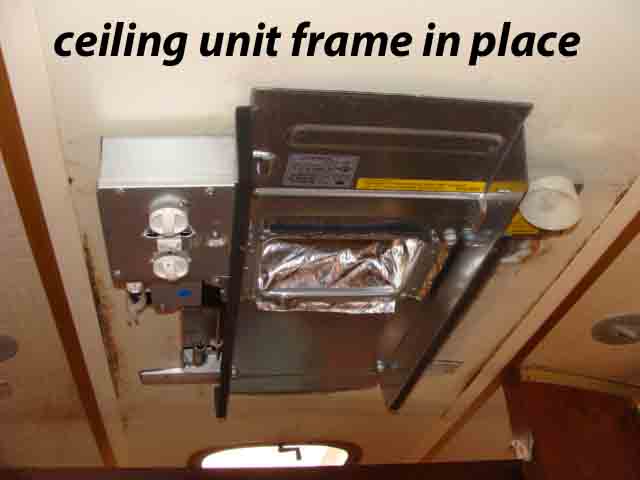
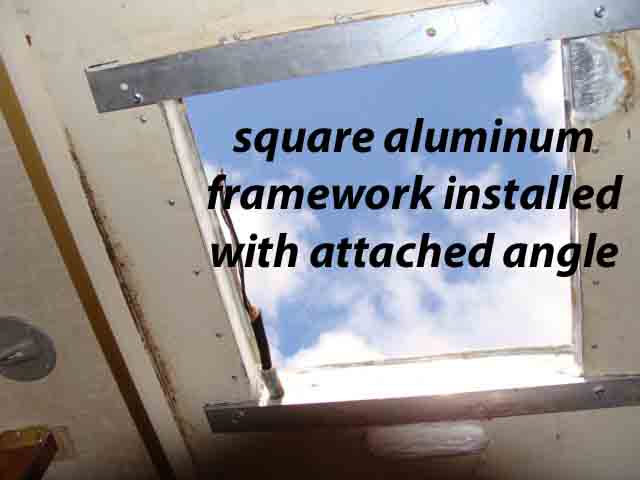
The curved front and back pieces were cut to fit the 14” opening. Aluminum angles were cut around 19” long to fit inside the plastic shroud and fit the radius of the ceiling on each side of the 14” opening. Then they were welded to the front and back cross pieces to provide a level place for the ceiling unit to draw up to. The straight side aluminum square tubes were cut to around 17 1/2" long and placed in first then the curved pieces were slid in to hold the straight pieces in place. All burrs and sharp edges were removed before installing.
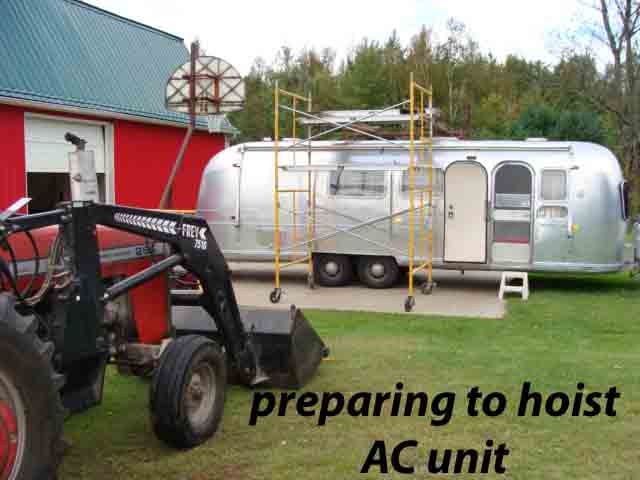
CAUTION: There were wires (both 12V and 120V) running down both the right and left sides of the14” by 14” opening. I wrapped them with 1/4" stick on foam and electrical tape and put a little fiberglass insulation between the wires and the tubing. Round plastic tubing was used as a conduit for the 120V lead. We pop riveted the tubing to the ceiling using 1/8” and 3/16” pop rivets and called it a day. The next morning I called our son Matt who said that he would be over after work to help set the AC unit in place. We went to work cutting the roof opening and used 3/16” pop rivets to secure the roof to the aluminum square tubing. I also used Dap acrylic silicone clear caulk between the inner and outer skins and the square aluminum tubing for extra strength. The lead wire was not long enough so I installed an 120V junction box to the square tubing. When Matt arrived the unit was set on its Styrofoam packing bottom, placed in the tractor loader bucket and elevated. It was then slid over the top of the trailer on a pick and the two boys lowered it over the opening while I guided it home. The 4 bolts were put in place and finishing touches were made.
 |
 |
 |
 |
|---|---|---|---|
 |
 |
 |
The optional drain line was hooked up since the copper stand line was already there. I blew it out to make sure it was open. A 3 1/2" hole was cut in the ceiling unit air way for an access hole to the top unit drain connection, the hole was covered with a door that bolts on. A small notch was cut in the side of the plastic ceiling shroud cover to allow the drain hose to reach the stand pipe. Clips were used to hold wires and drain hose in place.
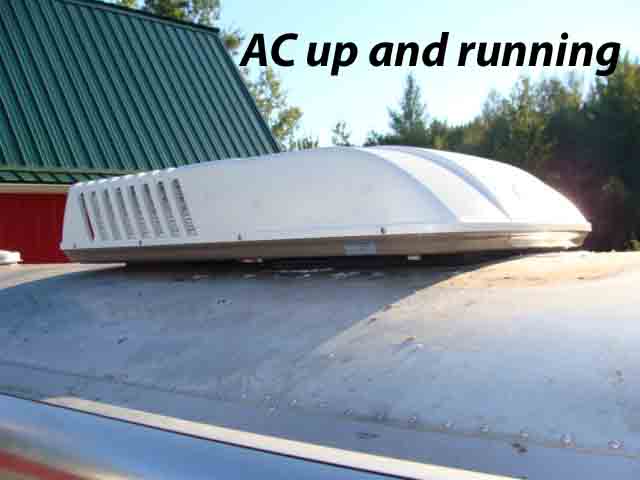
There’s one thing the Vicar’s Wife loves almost as much as me, and that’s an air conditioner that works. Well we fired it up and soon cool air was sweeping over us like snowflakes on a hot day. I had to unplug the trailer cord ta get her ta come in the house for the night.
You might ask, “Why would you go to all that work when the dealer can install it?” Well it probably took 3 or 4 days to install and I saved around $1500.00 in the process because of all the extra work and material for mounting the AC unit. That means I made around $400.00 to $500.00 a day in real money. That’s enough to buy some real serious Cowboy gear.
Hope ta see ya on the trail
God Bless,
![]()