![]()
By
Cree Vicar Dave – SASS Life #49907
While bending the ears of a few cowboys at our monthly match I mentioned that I was considering building a “John Bull” train locomotive for a prop. One of the items needed was steel spoke wheels to simulate the engine drive and guide wheels. It says in James 4:2 “…ye have not, because ye ask not.” KJV. Well one of my ole shootin partners, Mt Forest Ron, says he just happened to have some wheels laying around in the back forty in the process of bio degrading. He said he’d have a look see, time permittin, and dig em out. In the mean time proper sized wheels from old hay rakes were starting to amass. After a fortnight or two Mt Forest Ron pulled up to my spread and unloaded the wheels he had told me about.
It turned out the wheels he brought over were a set of steel spoke wheels from an old farm wagon. The ones that fit onto a 4”x6” wood axle. I had already rounded up enough hay rake wheels for the train engine but now the “John Bull Locomotive” would have to be placed on the back burner to allow a wagon to materialize. So you’ll have to wait a spell on a train engine article.
I made the whole wagon out of treated lumber since it’ll be a sitten out under the stars most of its life. There was part of the old wood axle inside one of the wheel cone shaped hubs that aided in shaping the new axle.
As I recall, the items used to manufacture the wagon were as follows: (All wood was treated lumber)
1-4”x 6”x10’ cut in half for the two wood axles
10-5/4”x6”x10’ deck boards for the wagon bed, side racks and seat back
8-2”x4”x8’ for the under frame, side rack stakes, tongue Tee end and angle brace, etc.
3-2”x8”x8’ for the seat, center cross piece of the 5th wheel (between 2 two by fours) and the front splash shield and splash shield brace
1-2”x6”x8’ for the tongue main beam cut around 7’ long and tapered to 3” wide with an eye bolt in the front end. The back end has a 2”x4” tee around 30” long and 2”x4” angle bracing
3#-2 1/2” coated self tapping deck screws
2# 3” coated self tapping deck screws and a hand full of 1 5/8” coated self tapping deck screws
Untold number of tubes of DAP Acrylic Silicone clear caulk used for glue.
I don’t like haven things come unraveled so I use the caulk/and or glue and screws on most projects.
5-3/8”x4 1/2” lag eye bolts. One for the narrow end of the tongue and two for the Tee end and two for the front axle aligned with the ones in the tongue.
2-5/16” quick links to connect the eye bolts of the tongue to the eye bolts on the front axle. You could use a large set of gate hinges instead of the eye bolts and quick links.
Around 12” of 3/4” copper pipe for the front axle 5th wheel pivot
Around 12” of 3/4” threaded rod for pivot
2-3/4” lock nuts for the threaded rod pivot
2-3/4” flat washers for the rod pivot
2-7/8” flat washers for the pivot
3-1/2” x8” carriage bolts with washers and nuts for rear axle attachment
4-1/2”x3’ threaded rod for holding wheels onto axles
4-1/2” flat washers for T rod
4-1/2” lock nuts for T rod
1-1/2” long connecting nut for T rod on rear axle
10 gauge steel plate for wear plate on 5th wheel and front axle and maybe some odds and ends
The most aggravating part of the whole adventure was removing the wheel oxidation. It’s remarkable how much crud builds up over time. The rust crust was near half inch in spots. I thought about having them sand blasted and primered. But then I got to thinken, “At my age I’ve got a lot more time than money.” So I borrowed a power wire brush, dug out the ole chipping hammer, and after a few days the wheels looked respectable. A coat of rust proof under coat and then one of black enamel made the wheels presentable. Be sure to use proper respirators, safety glasses, ear protection and other safety equipment when removing rust and painting etc.
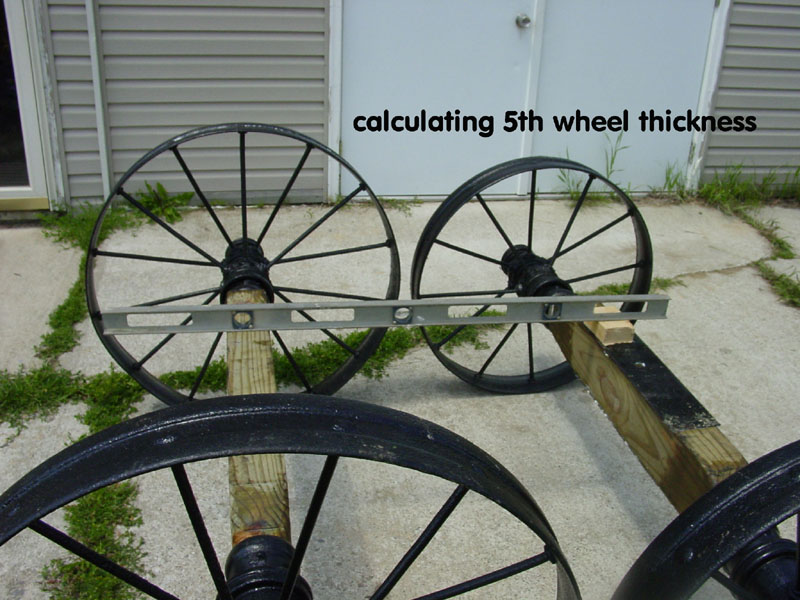
I made the wagon bed 32” wide by 10’ long but if you use 5 deck boards it will save time and wood and the wagon would look just fine at 29” side. I mounted the rear axle to the underside of the deck boards with the 8” carriage bolts. Then a 2”x4” frame was run round the outside of the underside of the bed and two by four cross pieces were put in for support at around 2’ centers. Two by four gussets support the rear axle. A 2”x8” was cut and placed cross ways between the side frame on the bottom front of the bed along with a 2”x4” to serve as a 5th wheel, all caulked and screwed in place. Then 10 gauge steel plates were counter sunk, caulked and screwed to the bottom of the 5th wheel and the top of the front axle with the proper 7/8” holes aligned. The 1 1/2” thickness of the 5th wheel plus the quarter inch of the 10 gauge ware plates gave the proper height to allow for the difference in the diameter of the back and front wheels.
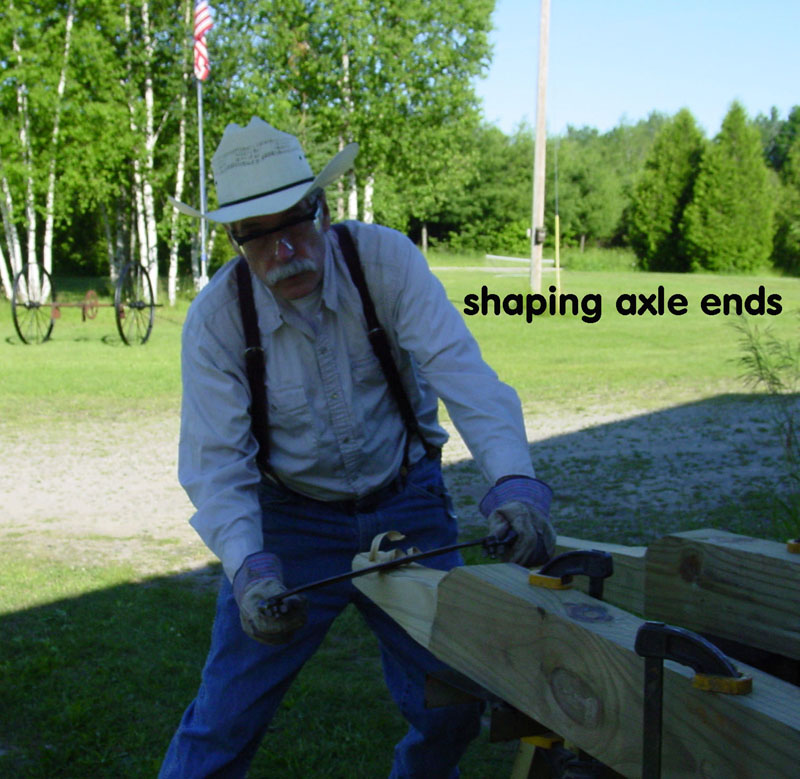
The forming of the axles was challenging. The piece of old wood found in the wheel helped in surmising the shape. Forming the ends of the wood axles takes a while. The taper is around 5⁰ and around 15” long, but on the top it juts up the last few inches. It starts out at around 1 3/4” diameter and ends up coming out of the hub at around an oval of 3 1/2” wide by 4” high. The 6” part of the 4”x6” is the vertical part of the axle. It helps to look at an old wagon under carriage before you start whittling. I used a draw knife, with the shave and try method. The bottom of the coned shaped ends have a half inch rabbit cut in them to allow for the 1/2” threaded rod to pass through the hub. The washers and lock nuts hold the wheels onto the wood axles. The rear axle utilizes threaded rod to hold the wheels on.
The front axle has a metal plate 1/4“x 3 1/2” x 16” long with a 1/2” threaded rod welded to each end. A 7/8” hole was drilled through the center of the plate, vertically through the center of the front axle, through the 5th wheel (around 8” form front and centered on the bed), and through the center of the 10 gauge ware plates. The 3/4” copper pipe was placed through the 5th wheel and axle, after all hardware was installed, with an ample amount of grease applied to the copper pipe and ware plates. Then the 7/8” flat washers were placed over the pipe on top and bottom. The pipe was cut around a quarter inch longer than the washers on each end. The copper pipe was then peened over onto the 7/8” washers. The 3/4” threaded rod was cut to proper length and installed into the copper pipe with a 3/4” flat washer and lock nut on top and bottom. The copper pipe makes a smooth 5th wheel pin and protects the T rod from being eaten up by the treated lumber.
The side racks are deck boards ripped to around 4”wide. I rounded over the ripped side to match the milled side. I just caulked and screwed the 2”x4” uprights in place on the bed, caulked and screwed the deck boards on and added sheet metal pockets for looks. The splash shield is made out of 2”x8” material with 2” bracing.
 |
 |
 |
 |
 |
 |
 |
 |
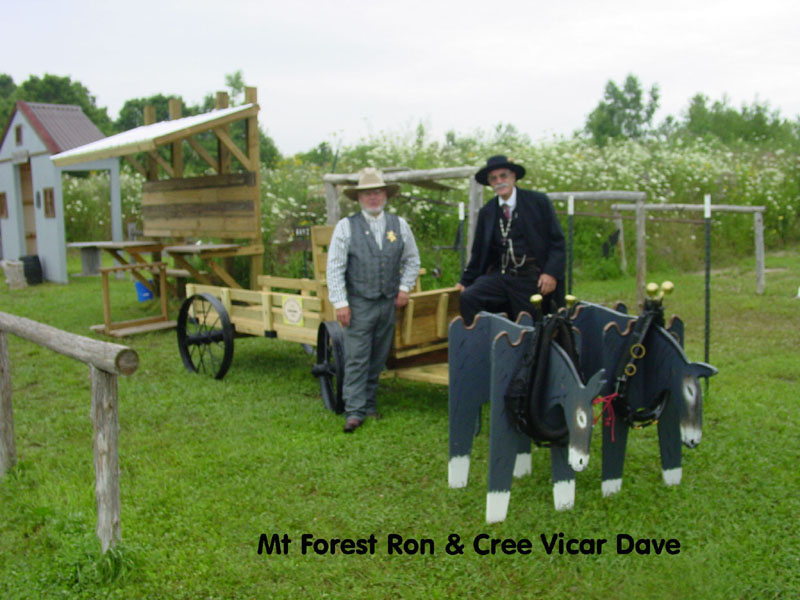 |
It took around two weeks to complete. I caulked and screwed everything to everything that didn’t move. Most of the screw holes were pilot drilled to avoid splitting the wood. We decided to call it a freight wagon since there’s not yet an established Cartage Company at sucker Creek. The sign on the side rack reads: “MT FOREST RON & CREE VICAR DAVE – CARTAGE COMPANY – SUCKER CREEK, MICHIGAN”. Business is a little slow at present but the way new people are coming ta town it’s sure ta pick up.
Remember to always follow all safety and health rules when working on projects and playing with them. You should use proper fasteners on treated lumber because it has a tendency to eat unprotected steel big time.
When the treated lumber dries out we’ll give the ole freight hauler a good coat of John Deere green enamel. Then it’ll look nice enough to drive ta Church.
Hope ta see ya on the trail
God Bless,
![]()